
Meta has been introducing the function for a couple of years now Facebook Shop (and Instagram Shop), which allows companies to create their own showcase on two of the most used and popular social networks in the world. The growing popularity of which it has been the protagonist in recent months, has pushed more and more businesses to approach this tool, also by virtue of the fact that it is completely free.
To take advantage of the Facebook Shop to its fullest potential, however, it must be configured correctly. Below you will therefore find a guide that will explain step by step everything that needs to be done, what to avoid and some useful tips.
How to get started
Although it may seem trivial to many, to take advantage of the Facebook Shop the first step is obviously to have created a Facebook page of your business. After that, some preliminary operations are necessary before you can configure the Shop. Therefore, make sure you comply with the following conditions:
- You must be an administrator of the Facebook page;
- You must be an administrator of the Business Manager;
- You must own an e-commerce site (this excludes sites such as Amazon);
- You need to verify the domain of your site in the “Brand Safety” section (located within the Business Manager).
Furthermore, if you want to implement the Shop also on Instagram, you must meet two other conditions:
- Being an administrator of a professional Instagram account;
- Connect the Facebook account with the Instagram account.
Once you have fulfilled all these requirements, you can move on to creating the Shop.
How to set up the Facebook Shop
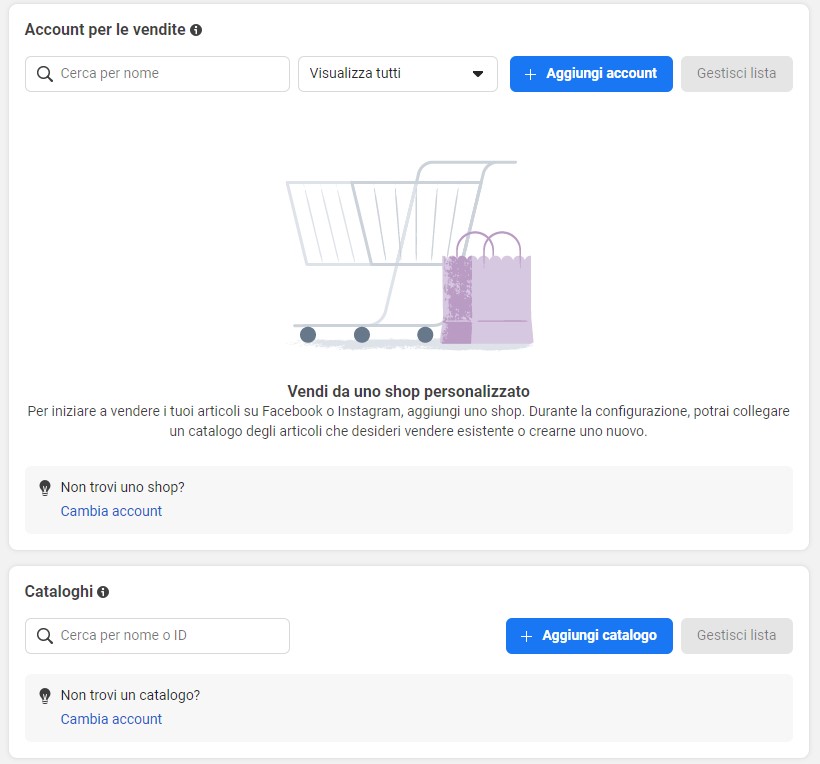
The first thing to do is to access your Business Manager and, in the drop-down menu, select the item "Sales Manager".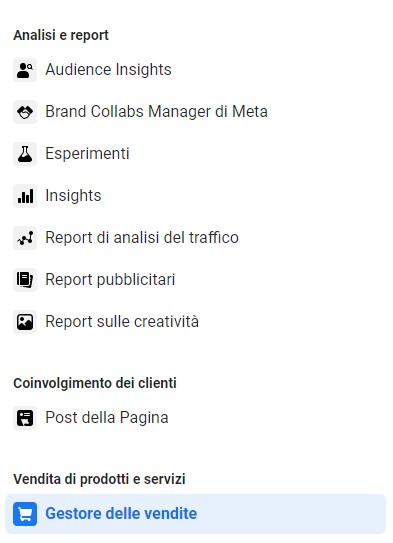 Now a new page will open, where you will have to select “Add Account”.
At this point the actual configuration of the Facebook Shop, which is divided into four phases. Let's see them one by one.
The procedure
The process of configuring the Facebook Shop, although guided, it is not always intuitive and easily understandable for the layman. The four steps to take in this section are:
- payment method setting;
- setting up the sales channel;
- connection of the shop with a company account;
- summary, verification and completion of the configuration.
Payment method setup
Facebook Shop allows you to choose the method by which to sell your products, thanks to three different options:
- purchase via another website;
- purchase through messages;
- direct purchase.
The first case provides that users who click on your product on the Facebook Shop are sent to your e-commerce site, where the eventual sale takes place. The second point, the less common one, saves you from setting up a purchase procedure. Interested users will be redirected to your WhatsApp Business or Messenger account and will have to contact you to complete the purchase.
Finally, there is also the possibility (for now only in the United States) to make sales directly from Facebook (or Instagram).
Setting up the sales channel
It is a simple operation, you simply have to select the Facebook page (and possibly the Instagram account) to which to connect the Shop. From the list that will be shown, select your business page and enter the required information: email address and website URL.
Linking the shop with a company account
Now you need to link the Business Manager account you intend to use for the Shop. If you have more than one corporate account, make sure you link the correct one, otherwise you won't be able to manage the Facebook Shop.
Configuration summary, verification and completion
If you have not yet created a product catalog, the wizard will send you directly to the summary of the operation, automatically creating a catalog in which you can subsequently insert your items.
After checking that you have made all the required connections correctly, click “Complete setup”. It will now be up to Facebook to check and approve your request. This usually takes 24 to 48 hours.
To find out if and when yours Facebook Shop has been approved, periodically check it State of the account in section Settings. When the writing appears Active, all that remains is to click on the "Publish Shop" button to actually see it online.
The Facebook Shop product catalog
The last thing left to do is insert products to be "showcased" in the Shop. Go back to the Sales Manager section and select the "Add catalog" item, to create one from scratch, or on the "Catalog" item, to modify an existing one.
To load the products, select "Articles", then you will be offered four ways to do the operation:
- manual;
- group;
- Facebook pixel;
- connect a partner platform.
If you opt for the manual solution you will have to upload the items individually, add a photograph, product name, description, price and any other features. The batch upload, on the other hand, allows you to upload a CSV, TSV or XML file, to insert multiple products at the same time.
The Facebook pixel, for those unfamiliar with this tool, is a strip of code that measures and collects data on the behavior of users who interact with your Facebook page. It also allows you to import all products directly from your e-commerce site.
Finally, by connecting a partner platform, it is possible to import articles directly from platforms such as Shopify, Magento, etc.
Do you still have doubts? Contact us for more information or a quote! We will be happy to help you better understand the world of social media!